
Sponsored Content Brought To You By Alure Home Improvements
Whether it’s air-conditioning or heating season, leaks at home can cost you energy—and that adds up to money blowing in the wind. An estimated 65 percent of a homeowner’s utility bill is used to heat or cool the indoors. Don’t let it go to waste. Weatherization is the solution. That means examining your outside doors and windows for cracks around the frames and filling them in with caulk. You might also want to check your attics, basements or crawl spaces for any gaps because they too can be a problem.
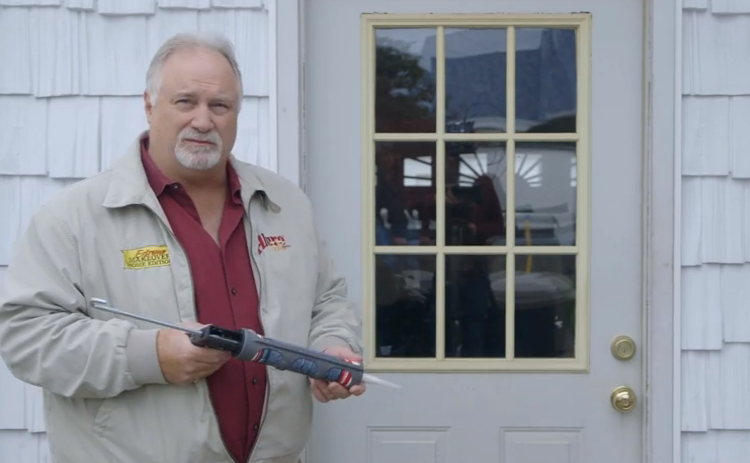
Thanks to this recent installment of the “60 Second Fix: How To Caulk An Exterior Door In 60 Seconds,” featuring Alure Home Improvement’s chief operating officer Doug Cornwell, you’ll learn the simple steps required to get the most of your caulking experience. Since you’re doing the exterior of your house, you want to make sure that you select the right caulk so it will withstand any kind of weather. Silicone, not acrylic, caulking is preferred, because it is permanently waterproof, flexible, and shrink- or crack-proof. Remember, caulk is not an adhesive—it won’t bond wood together, or tiles to a wall or a floor. And here’s something else to consider: If the crack is wider than half an inch, you might have to get a foam rod that you can wedge into place before you caulk.
So, once you have the proper caulk, you’ll need the caulk gun to squeeze it out of the tube properly. Don’t leave the hardware store without it.
Preparation is also important. You don’t just apply new caulk on top of old caulk. It won’t work effectively. Use a razor blade or a sharp knife to remove the old caulk first so you remove any mold or mildew that might have collected on the surface. Next, clean the crack with a rag dampened with a household cleaner or rubbing alcohol, or a wire brush. Then wipe the area with a clean cloth because you want to make sure that the surface is clean, dry and free of grease, dirt and dust before you begin to caulk.
Okay, now you’re ready to caulk, and this is where Cornwell comes in with his expertise to improve your technique.
“When you’re opening a tube of caulking,” Cornwell says, “you want to make the smallest hole possible at the end of the tip.”
As Cornwell puts it: “Less is more.” How wide a hole you need depends on the width of the crack, of course. But a professional-looking bead, which is what a line of caulk is called, begins with the properly sized opening. A cut near the tip produces a thin bead, a cut further down the nozzle yields a thick bead.
Next, you’ll have to break an inner seal on the silicone tube before you insert the tube into the caulk gun. Take a stiff metal wire or a similar-sized object like a nail and poke it through the tip until you feel it break the seal. Many caulk guns come with just the right sharp tool for this function. Cornwell shows how it’s normally folded along the gun when it’s not needed.
And there’s a thin rod that’s part of the caulking gun about the size of a 10-penny nail [?] and insert that through the tip to free the passageway, to make sure the caulk can travel freely… from the tube to the tip…
Once you’re sure the caulk will flow freely, insert the tube of caulking into the gun and squeeze the trigger a couple of times so the small metal plate attached to the rod advances into the flat bottom of the tube and begins to exert pressure.
“Make sure it’s snug and ready to go,” Cornwell says. You should be able to see the caulk fill the tip and be ready to emerge.
Caulking novices might want to practice on cardboard first, but not Doug Cornwell, he’s an old pro, and he goes right to work.
“One thing you want to keep in mind when you’re caulking, whether you’re caulking a door, a window, or even a wine bottle, you want to keep constant, even pressure,” he advises.
“As hard as you squeeze is as fast as you want to move,” Cornwell says. “If you want to squeeze very hard, you have to move very fast. It’s got to be tempo: tempo, tempo, tempo!”
For a doorway or window frame, he says, “You always start at the top corner and work your way down.”
Hold the caulk gun at a 45-degree angle and press the tip right into the corner. Then start squeezing the trigger as you slide the tip downward, making sure the flow produces a nice, constant bead of caulk.
Steady as it goes is the key. Watch Cornwell as he keeps the pressure even, and the caulk flowing out smoothly. He follows along, bending when necessary to maintain the proper angle.
Click here to learn more about Alure Home Improvements
Next comes what the experts call “tooling,” which means smoothing the bead. This step is just as vital to the task and should not be skipped. Cornwell recommends taking a paper towel, dampening it with a little bit of water. Then moisten your fingertip, which turns out to be the perfect “tooling” device here, and run your finger very lightly over the bead.
“Go over the caulk to make sure it bridges both surfaces and the crack is filled,” Cornwell says.
When you’re confident the crack is “caulked,” then use the damp paper towel to wipe the excess residue off your finger.
And there you have it.