Content Sponsored by Alure Home Improvements
The last thing you want to worry about when you’re frantically getting ready to go to work is your bathroom sink. You just want to wash your face and hands and not have to give it a second thought.
But over time the faucet can become a headache that slows you down. The worst case scenario is that you turn on the faucet to rinse your hands in the sink, and suddenly water is spraying all over the place.
Fortunately, Doug Cornwell, Alure Home Improvements’ chief operating officer, has a simple fix in store.
“So how come the water is spraying all over?” Cornwell asks in a recent episode of “Alure’s 60-Second Fix: How To Clean A Faucet Aerator In 60 Seconds.” “The reason is that at the end of the faucet is an aerator.”
This little circular device helps add air bubbles to the water, making the flow feel softer on your face and hands. For an added benefit, a properly working aerator can even help you reduce the overall amount of water you use by making the flow more efficient.

Just as important, an aerator also acts as a filter, catching any dirt in the water supply. As the particles build up, the aerator screen can get just as clogged as a drain. When the aerator is working properly, the water flows so naturally that you don’t even know the device is there. But when its fine mesh screen gets blocked by debris that’s accumulated over time, the flow is interrupted. Eventually it could get so bad that the water will spray out, even dribble back up the faucet instead of pouring into the sink, creating an annoying puddle.
But to make the faucet work as good as new doesn’t require a plumbing license. You don’t even have to shut off the entire water supply to the sink.
The procedure is so simple you could practically do it with one hand, as Cornwell demonstrates in this helpful “60 Second” video. He boils it down to five easy steps:
Step 1. Turn the faucet on.
Step 2. Unscrew the aerator.
Step 3: Pull the stopper.
Step 4. Rinse the aerator.
Step 5. Screw the aerator back on.
Before you begin, though, make sure the sink stopper is blocking the drain because the aerator has a small screen and a round rubber gasket that sometimes sticks inside the aerator. You don’t want to accidentally drop anything down the drainage pipe! But you will need to separate the aerator parts for best results—and remember how to replace them in order.
Once you’re ready, you can unscrew the aerator counter-clockwise from the faucet.
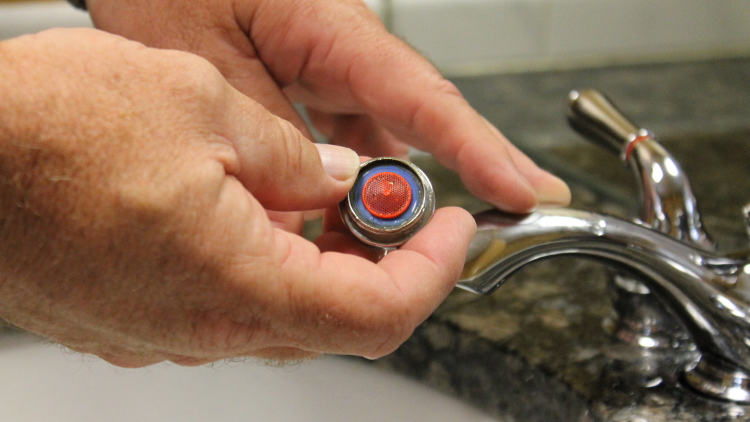
After you’ve removed the aerator, take the screen assembly and place it in your palm. Then turn the water faucet back on. Rinse all the particles off as you gently rub it between your fingers and thumb. Don’t take too long or the sink will overflow.
Next, inspect the results, and if the aerator looks clean, then you can shut the water off. For stubborn debris, try an unwanted toothbrush and some mild solution like white vinegar. Sometimes you need to let the aerator soak in a dish or a bowl until the particles float away. Usually, cleaning a faucet aerator is a breeze. But if the screen looks old and damaged or it’s turned too rusty, you might have to replace it.
“Once it’s all nice and clean, screw it back on!” Cornwell says. “Make it nice and tight.”
Click here to learn more about Alure Home Improvements
But try to use just your fingers, not a wrench, so you can unloosen the aerator more easily the next time you need to clean it. The last thing you want to do is bend the aerator with a wrench so it won’t smoothly screw back on the faucet.
Once the aerator’s in place, then you can unstop the drain and open up the sink for a quick run-through.
As Cornwell exclaims, “Look at that: no spray at all!” The aerator is functioning as it’s intended to do. And it barely took a minute.
So, to complete the task, just wash out any leftover particles or debris left in the sink.
And, as Cornwell puts it with a laugh, “Now you can head off to work!”


