Sponsored Content Brought To You By Alure Home Improvements
Over time, doorknobs in rooms that see a lot of daily traffic, such as the bedroom or the bathroom, need to be replaced. Maybe the parts become stiff, wear out or grow too loose with the constant use. Whatever the cause, the doors stop doing what they’re supposed to do.
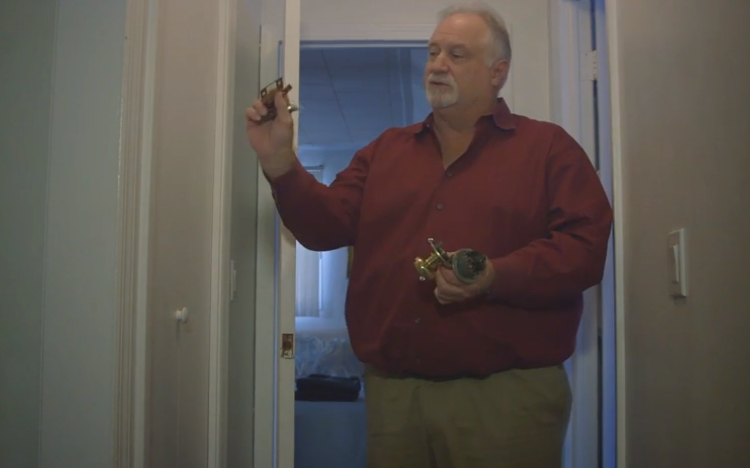
Alure Home Improvements’ Chief Operating Officer Doug Cornwell has seen it all, and he is unfazed.
“I’m not really sure if a doorknob is intended to keep people out or keep people in, but regardless, you need a doorknob!”
Here, in another installment of “Alure Home Improvements’ 60 Second Fix,” titled “How to Replace Your Doorknob,” Cornwell shows how relatively simple replacing an old doorknob with a new one can be.
All you need is a little patience, the proper tools, and, of course, a brand new doorknob.
You want to make sure that the doorknob is made for an inside room, not the front door or the backdoor of your house. Also, in this video example, the doorknob is the most basic design, without a lever-style handle or a dead bolt. Those doorknobs may require a little more know-how but the principal is the same.
As Cornwell amusingly puts it, privacy is an important consideration with any door. How important is locking this door or not? If you want to lock it from the inside—unless it’s for a medicine closet—make sure you put the lock on the doorknob pointing in the right direction.
The components of a basic doorknob include the strike plate, the striker, the inside knob and the outside knob, plus the appropriate screws. The striker, which is part of the pawl assembly that goes inside the door and connects with the two exterior knobs, has a smooth sloping side on its end that must be positioned properly or the door won’t close—it will just bang shut. The slanted side should always point inside the room so the flat side faces away.
On the edge of the door itself the striker protrudes through a small rectangular face plate that is set flush with the door’s surface. It is attached by two wooden screws, one above the striker, the other below it. He advises that you put the striker in the door together with its cover plate where they belong but leave it loose until later.
“I like to set it in but not lock it in because it gives me some flexibility before I start to put the knobs in on either side,” says Cornwell.
Next, for the knobs, you want to line up the outside doorknob with the striker shaft and push it through the doorknob hole to the other side. Then line up the inside doorknob, and push them together. When you’re inserting the doorknobs into the door, make sure the square peg shaft fits through the square opening in the assembly and that the screw holes match up with the threaded cylinders on the other side. Lining up the components so they’re plush against the door ensures that the doorknob mechanism can function properly.
He inserts the screws in the two holes of the doorknob cover plate, which is usually around the inside doorknob, where the lock would be. A screwdriver adds the finishing touches for the final twists.
Cornwell likes to get a snug fit before he tightens up the wood screws for the striker cover plate.
“This way I make sure the doorknob is square in place and it’s going to function when we’re all done,” he says.
The next step is to mount the strike plate on the door jamb. This small piece of sculpted metal takes a beating but it doesn’t have any moving parts so there’s nothing to worry about. But make sure the plate is lined up squarely. Wedge the flat edge of the plate against the wooden frame where the old one was and place the smooth, rounded edge facing away from the room so it guides the striker latch into place without a hitch. The rounded edge almost looks like a curled lip. If the plate is positioned the wrong way, it won’t lie flush with the door jamb.
Click here to learn more about Alure Home Improvements
So when you’re ready to finish the task, tighten all the screws so the assembly hangs together. Make sure the doorknobs turn smoothly and the plates don’t rattle when the door swings open or slams shut.
Thanks to Alure’s Doug Cornwell, installing a new doorknob isn’t so hard to handle at all.


