
Sponsored Content Brought To You By Alure Home Improvements
Do you want to add an outlet to your home but you’re worried that you might be unable to cut a hole in the wall?
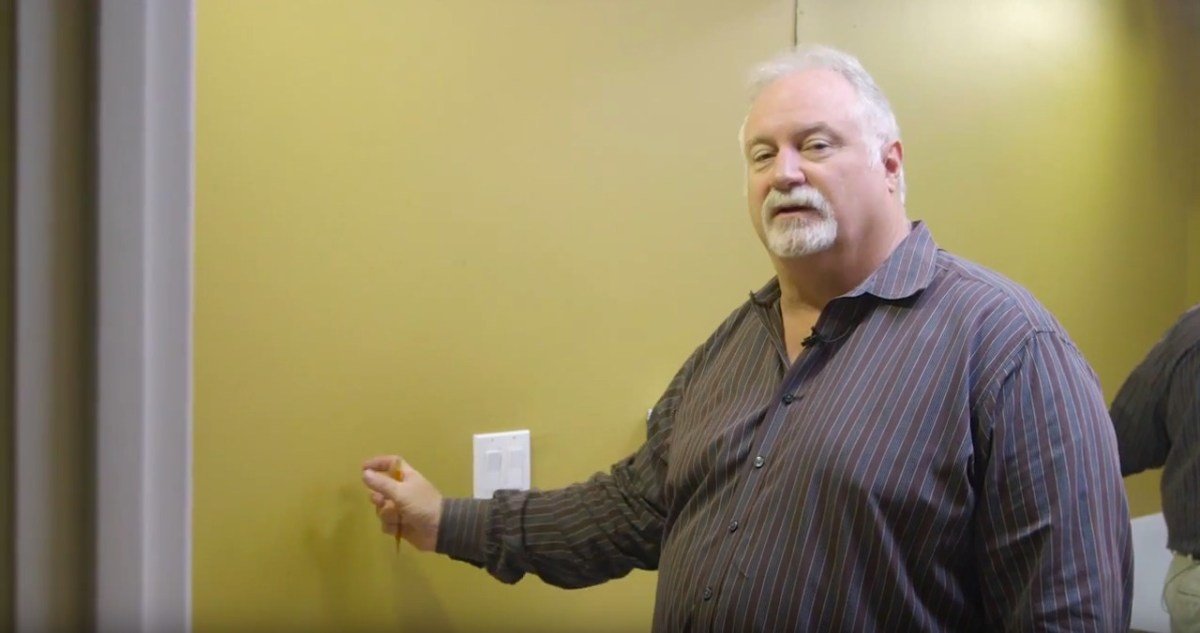
Fear not, because Doug Cornwell, the chief operating officer of Alure Home Improvements, shows you how easy it is to create the space you need in this recent installment of Alure Home Improvements’ “60-Second Fix: How to Cut a Hole for an Outlet in 60 Seconds.”
Here, the goal is simple. He’s recently installed a new double-switch for the lights, and now he wants to add an electrical outlet nearby for the plugs. He demonstrates how to cut through the finished Sheetrock without making a big ordeal out of it so you can simply insert an electrical outlet box right into the hole.
The key to this process is that the wall is already finished. The Sheetrock has been installed and painted; the underlying wall studs are covered up so you can’t access them. This distinction is important because it determines what kind of electrical box is suitable for installation.
“Part one is getting the wire there,” he explains. “The other part is cutting the hole out so you can put the box in. Today I’m going to show you how to cut the box out.”
Cornwell uses what is called an “old work” or “retrofit” PVC outlet box, which means that the plastic box is not intended for new construction projects.
“The walls are closed,” Cornwell explains here. “They’re not open.”
He holds the plastic blue box, and recommends that you make sure it’s up to code in your area, which you can do when you’re at your local hardware store.
Generally, these electrical boxes come in two kinds: plastic or metal. The plastic boxes are easier for the amateur handyman to handle because they’re lighter than metal and they’re also cheaper.
“First thing you want to do is determine the location of the hole,” Cornwell advises.
https://www.youtube.com/watch?v=WON0DKCe5P8
As he shows here, you want to keep the outlet at approximately the same height as the switch for aesthetic purposes and convenience. Take the box and place it firmly against the wall with one hand so you can outline the straight edges with a pencil. Carefully mark all four sides of the box on the wall.
“This way you know the area you want to cut out,” he says.
You can cut the hole out in several ways. For this job, he wields a small keyhole-type Sheetrock saw, which can cost between $5 and $10. Use whatever tool you’re comfortable with, because this task is not too time-consuming and the hole is manageably small.
The keyhole saw is built to penetrate the wall and enable you to perform the in-and-out sawing motion easily. Use the blade to follow along the pencil lines carefully. Try to be as exact as possible because you don’t want to leave an unnecessarily wide gap. When you come to the corner, carefully remove the blade so you don’t tear the wall surface, and then start on the other side.
Once you have the little section of the wallboard almost completely cut out, make sure you hold onto the piece so it won’t fall behind the wall.
Now comes the installation of the electrical box.
As Cornwell points out, the plastic box has two corner screws, one for the top and one for the bottom. Tightening each screw moves a little wing-like flap attached to the back of the box and starts to draw it up until it touches the other side of the Sheetrock and locks in place. These plastic tabs are supposed to act as clamps as they flip into action but they can be rather flimsy flappers, so don’t take them for granted.
“You want to go slow with this,” Cornwell says. “You don’t want to go too fast because you just want it to be snug up against the back of the wall.”
Done properly, it locks up the box’s top corner and bottom corner.
After you’re ready, you can place the box into the wall, line up the screws, and tighten them accordingly.
“Once you see the screw start to pull further into the box, stop,” says Cornwell. “You don’t want to pull it through the Sheetrock. That’s it. It’s in.”
Click here to learn more about Alure Home Improvements
To make sure he’s done, Cornwell prods all four sides with his fingers to make sure the electrical box won’t wiggle.
See how simple that was? Thanks to Alure Home Improvements, cutting a hole in Sheetrock is as easy as 1-2-3!